Ingredients
(Main dough) High-gluten flour ( 300g ) | (main dough) milk ( 200g ) |
| (Main dough) sugar ( 10g ) | ( Main dough) Salt ( 2 grams ) |
(Main dough ) Corn oil ( 25g ) | (main dough) yeast ( 3g ) |
(stuffing) garlic ( 50 grams ) | (Stuffing) shallots ( 10g ) |
(filling) unsalted butter ( 50g ) | (filling) salt ( 3 grams ) |
(Brush the surface) whole egg liquid ( appropriate amount ) |
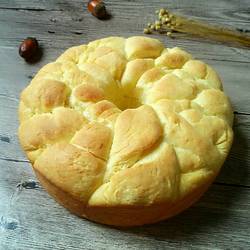
How to make garlic salty bread
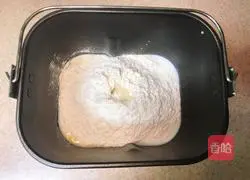
1. Put all the ingredients for the main dough into the kneading bucket of the bread machine in the order of liquid first and then powder (the yeast will finally dig out the middle of the flour) into the small hole).

2. Start kneading for about 20-30 minutes.The dough will be smooth and soft and can be pulled out.Large sheets of transparent film.

3. Arrange the dough into a round shape, cover it with plastic wrap and let it ferment in a warm place.

4. While the dough is fermenting, make the filling.Chop the shallots and garlic into a puree.

5. Melt the butter over medium-low heat.

6. Add garlic and shallot paste and stir-fry over low heat until fragrant, turn off heat and set aside spare.

7. About 1.5-2 hours, the dough will ferment until it doubles in size.

8. Press and fold to deflate, divide the dough into 4 equal parts, cover with plastic wrap and let rest 20 minutes.

9. Roll the loosened dough into a uniform thickness according to the size of the kneading mat.4 8-inch dough sheets.

10.Take a piece of baking paper, put a piece of rolled dough, brush and fry Once the filling is done, cover it with another piece of dough and continue to brush it with a layer of filling.

11. After finally covering the fourth dough piece, use a rolling pin to roll it slightly to tidy up the shape..

12. Use the back of a knife to press out 8 equal portions of the dough, with a cup in the middle Press out a small circle with your mouth.

13. Refer to the picture and divide it into 8 equal parts along the pressed marks (note the center Do not cut the circle), and then divide each cut into two parts (note that this time, the circle should be cut slightly beyond the first dividing line).

14. Refer to the picture, first twist the two divided pieces of dough upright, facing towards Twist it twice like twisting a twist, pinch the ends together, close the ends and press them downwards.

15. After everything is sorted, put it into an 8-inch pizza pan and let it rise in a warm place until 1.5 times the size and brush a thin layer of egg wash on the surface.

16. Preheat the oven to 200 degrees and bake for about 25 minutes (pay attention to the middle) When the surface of the bread is about the same color, cover it with tin foil to prevent it from getting too dark).

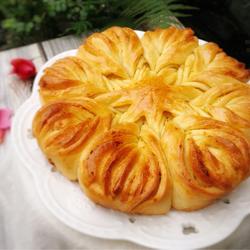
17. The fragrant and beautiful bread is ready, come and try it!
Tips
1.Before rolling out the dough into a round shape, the 4 small pieces of dough must be relaxed enough.If they always shrink when rolled out, it means that the relaxation time is not enough.Just relax them for a while.
2.This bread is a fancy bread.If the novice shaping time is too long, it will affect the second batch time.
3.When the weather is too hot, the fried filling can be placed in the refrigerator for a while to allow it to solidify slightly to facilitate later operations.
4.The time and temperature of the oven are only a reference.The specific parameters should be adjusted according to the temperament of your own oven.
Copyright Statement:This article is a reprinted article, and the copyright belongs to the original author. Please retain the source when reprinting!