Ingredients
Vanilla flavored dough ( appropriate amount ) | Chocolate dough ( appropriate amount ) |

1. Vanilla flavored dough: 150 grams of low-gluten flour, 80 grams of butter, 60 grams of powdered sugar, 25 grams of eggs, 1.5 grams of vanilla extract (optional)
Chocolate dough: 130 grams of low-gluten flour, 20 grams of cocoa powder, 80 grams of butter, 60 grams of powdered sugar, 25 grams of eggs, almonds 0.5g of essence (optional)
Also prepare an appropriate amount of eggs as a binder2. After the butter is softened, add powdered sugar and stir evenly; stir slowly until the powdered sugar and butter are combined Just make it even and don't beat the butter.
Add eggs to butter and mix well.It is better to add the eggs in two times (whisk until the first egg and butter are completely combined before adding the next time).
Just mix the eggs and butter completely and evenly, do not beat them either.Add vanilla extract and mix well.3. After sifting the low-gluten flour, pour it into the butter paste, and mix well with a rubber spatula until the flour and butter are completely mixed to form a dough.
Put the dough in the refrigerator for more than half an hour until the dough becomes dry and easy to work with.4.Then use the same method to make a chocolate dough, mix and sift low-gluten flour and cocoa powder, replace vanilla essence with almond essence; put it in the refrigerator for more than half an hour.
5. Place the refrigerated and relatively dry vanilla-flavored dough on the chopping board and roll it into a rectangle with a thickness of about 1CM; roll the chocolate-flavored dough into a rectangle of the same size with a thickness of 1CM.
6. Brush a layer of egg liquid on the chocolate dough as an adhesive, and cover the chocolate dough with the vanilla dough to make them tightly adhered.Place the dough in the freezer of the refrigerator and freeze for half an hour until firm.
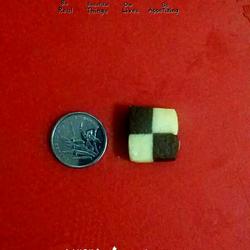
7. After the dough is frozen hard, cut it into 1CM wide strips; brush the cross-section of one strip with egg liquid as an adhesive; cover the other strip with egg.The long strips of liquid will form a checkerboard shape with staggered colors; then place it in the freezer of the refrigerator and freeze for about 30 minutes.
8.Cut the frozen dough into small biscuits with a thickness of 0.5CM; place the cut biscuits on the baking sheet, leaving a certain gap for each biscuit.
Put the baking sheet into a preheated 190-degree oven on the middle and upper rack, and bake for about 10-12 minutes.
Take out, cool and then seal and store.
Tips
1.Making checkerboard biscuits is very simple, but the process is a little complicated.As long as you follow the steps step by step, you should be fine.
2.The shape of checkerboard biscuits is very beautiful, so it is very important to maintain its straight shape.When cutting the dough, pay special attention to the consistent length and thickness of the dough of the two colors (I also failed to do it well) This point), so that the chess grid is neat.The dough uses all powdered sugar and no whipped butter, so it has low extensibility and can maintain its shape well when baked.
3.Stack two more layers of dough on top of this mini chess biscuit to make a 4*4 large chess biscuit.
4.The dough needs to be refrigerated for a while to allow it to have a certain hardness before rolling, otherwise it will be sticky and difficult to handle.When rolling out, sprinkle a thin layer of flour on the cutting board to help prevent sticking.
5.I like to use fermented butter when making biscuits, cookies, and cakes.Personally, I think the taste of the finished product will be more fragrant.You might as well give it a try 😉
Copyright Statement:This article is a reprinted article, and the copyright belongs to the original author. Please retain the source when reprinting!