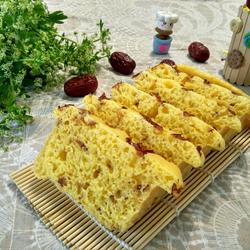
Health benefits
Butter: low protein
Ingredients
Butter ( 50g ) | Egg whites ( one ) |
Medium powder ( 50g ) | Powdered sugar ( 60g ) |
How to make protein crisps
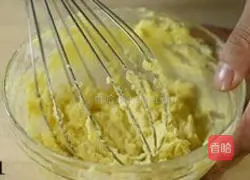
1.1.Soften the butter at room temperature (just soften it, never melt into liquid), add powdered sugar and stir evenly with a whisk, do not beat.
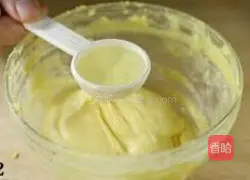
2.2.Add the egg whites in three batches and mix evenly with a whisk..

3.3.After the mixing is completed, it will be a fine and fluid paste..
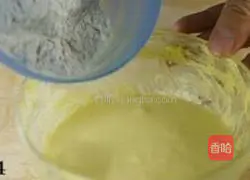
4.4.Pour in the sifted all-purpose flour.
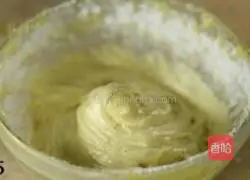
5.5.Continue to mix evenly with a whisk.Just mix evenly, remember not to over mix.
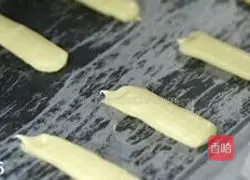
6.6.Put the mixed batter into a medium-sized round hole for mounting Use a flower bag and pipe out strips of batter on a baking sheet that has been greased with oil or lined with anti-stick paper.Place in the preheated oven at 160 degrees and bake on top for about 15 minutes, until the edges are golden brown.
Tips
Tips:
1.This biscuit does not require whipping butter.All operations can be completed in a basin without any complicated processes.It is a veritable "super" lazy biscuit.
2.Since there is no need to squeeze out the colors, we can use a simple fresh-keeping bag instead of a piping bag.Put the batter into a plastic bag and cut a hole of suitable size in the corner of the plastic bag to squeeze out the batter.
3.When squeezing the batter, the spacing between the batters must be larger, because after baking, the batter will become flakes, and if the spacing is small, they will stick together.
4.Because the biscuits occupy a relatively large area, you may need two trays to bake them.You can bake one pan first and leave the remaining batter at room temperature.You can bake the next pan after the previous pan comes out of the oven.
5.The biscuits must be heated to the right temperature, but be careful not to burn them.The biscuits should have a very crispy texture after cooling.
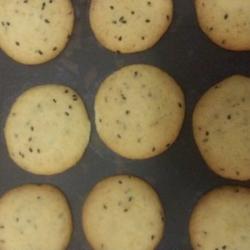
6.A special note for this: After using a plastic bag or piping bag to extrude the strip-shaped batter (step 6), it will automatically turn into an oval sheet as shown in the finished product picture during the baking process.
Copyright Statement:This article is a reprinted article, and the copyright belongs to the original author. Please retain the source when reprinting!