Health benefits
Butter: activate blood circulation and remove blood stasis
Eggs: enhance immunity, protect eyes and improve eyesight
Ingredients
High-gluten flour ( 472g ) | Powdered sugar ( 60g ) |
Butter ( 35g ) | Milk ( 155g ) |
Milk powder ( 35g ) | Salt ( 4g ) |
| Eggs ( 1 ) | Yeast ( 5g ) |
Cheese (spread on the surface) ( Appropriate amount ) | Egg liquid (brush the surface) ( appropriate amount ) |
diced ham (decorative surface) ( appropriate amount ) | Chopped green onion (sprinkle on surface) ( appropriate amount ) |
How to make cheese and ham croissants

1.First prepare the dough materials
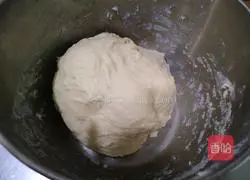
2.Mix all the ingredients evenly and knead into dough

3. After forming a smooth dough, take it out on a chopping board and knead it repeatedly until the dough forms.It will take about half an hour

4.Put it into a container, seal with plastic wrap, and ferment for about 60 minutes

5. Now prepare to sprinkle the required ingredients on the surface of the croissant.Remove the white from the green onion and cut it into small pieces.Cut the ham into small cubes (about 1 cm).Take out the cheese in advance and prepare an appropriate amount of egg liquid (I use one Eggs, enough)

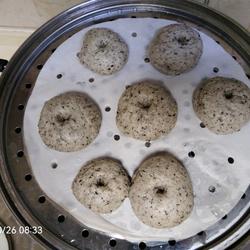
6.Observe that the dough ferments until it doubles in size (it’s cold) You can put a basin of hot water underneath)

7. Take out the dough and knead it into a long strip Status
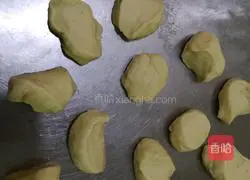
8.Cut into pieces of about 30g

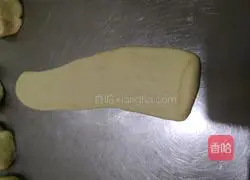
10.Use a rolling pin to roll it out again
11.Start from the bottom and slowly roll up

12.This is rolled to the middle What it looks like
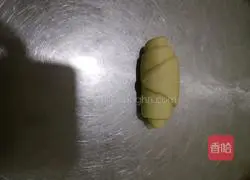
13.Then roll it up like this
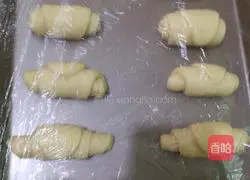
14.Put all the rolled dough into the tray and cover it with plastic wrap, let it sit for about 20 minutes, and do the second step Fermentation

15. After fermentation is completed, move to a baking sheet lined with oiled paper and brush evenly with egg Liquid

16.Wait for about 1 minute and brush again with egg liquid, then sprinkle with cheese in turn.Diced ham, chopped green onion

17.Put it into a preheated oven and heat it up and down to 160 degrees , bake for 20 minutes and it will be ready to bake

18.It’s baked, let’s try it p>

9.Knead it into this shape with your hands
Tips
1 Oven Remember to preheat in advance to save time
2 Each oven has different specifications and temperatures.Pay attention to the color change of the bread when baking
Copyright Statement:This article is a reprinted article, and the copyright belongs to the original author. Please retain the source when reprinting!