Health benefits
Butter: low protein
Yogurt: low protein
Eggs: eye protection and eyesight improvement
Ingredients
Oreo cookie crumbs ( 80g ) | Butter ( 40g ) |
Cream cheese ( 200g ) | Fine sugar ( 50g ) |
Yoghurt ( 160g ) | Corn starch ( 20g ) |
Eggs ( 2 ) | Light cream ( 100g ) |
Fine sugar (light For cream) ( 10g ) | White chocolate ( appropriate amount ) |
Sugar beads ( appropriate amount ) |
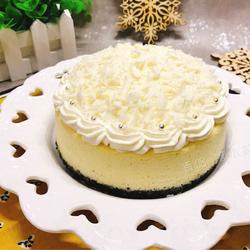
How to make snowy milk cheesecake
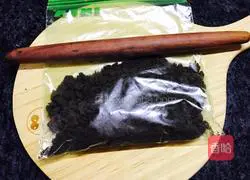
1.Crush Oreo cookies into powder with a rolling pin.
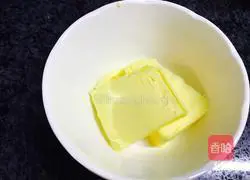
2. Cut the butter into small pieces and heat it in the microwave for about 30 seconds until it becomes liquid.
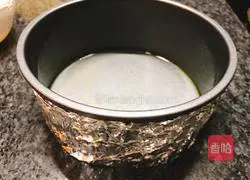
3. Wrap the outside of the mold with tin foil and apply butter on the inside wall.
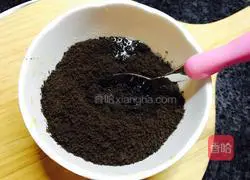
4. Mix the remaining butter and Oreos evenly.
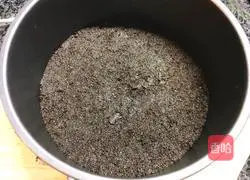
5.Place it on the bottom of the mold, compact it tightly and put it in the refrigerator for later use.

6.Put the egg whites into an oil-free and water-free basin.Put the egg yolks into a bowl.
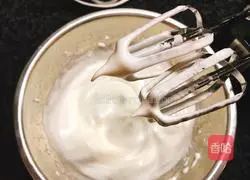
7.Add sugar to egg whites in three batches and beat until stiff peaks form.Refrigerate until ready.

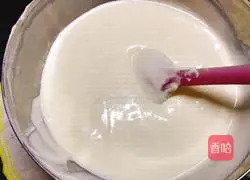
8. Beat the cream cheese with hot water until smooth.
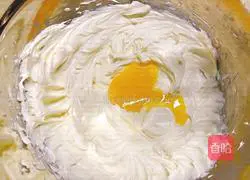
9.Put one egg yolk first, beat until smooth, then add the second one , continue to beat until smooth.
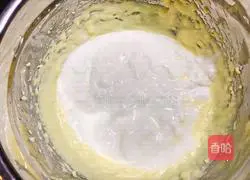
10. Pour in the yogurt and stir evenly.
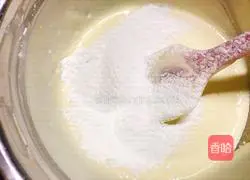
11.Sift in the corn starch and stir until there is no dry powder.
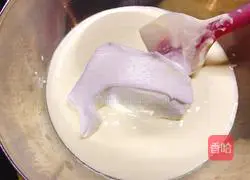
12. Scoop 1/3 of the egg white paste into the cheese paste and stir evenly.
13. Pour the paste from step 12 into the remaining egg white paste, and continue to stir evenly.
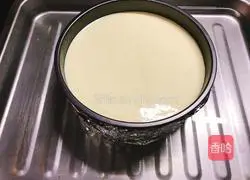
14.Pour into the mold and place the mold into a baking pan filled with water.
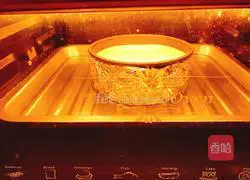
15. Place in an oven preheated to 150 degrees, heat up and down to 150 degrees, 75 minute.
16. Let cool completely and remove from the mold, then put it in the refrigerator for more than 2 hours.
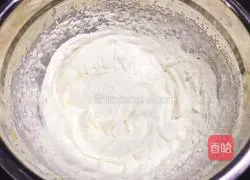
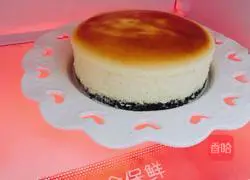
17. Beat the light cream and sugar until 9 points.The texture is clear, does not flow and does not spill when poured into the pot.

18.Put it into a piping bag and use a six-tooth piping nozzle to decorate the cheesecake.flower.
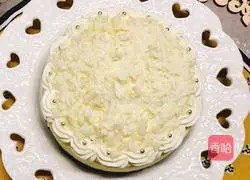
19.Finally sprinkle with white chocolate and sugar beads for decoration.
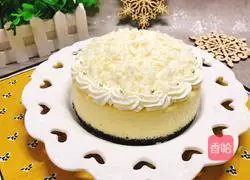
20.Picture of the finished product.
Tips
Ovens have different temperaments, and the temperature and time are just a guide.Don't take out the oven after the cake is baked, let it cool down slowly.
Remember to cover with tin foil after coloring.
The cake is very tender, so be gentle when unmoulding it.
Copyright Statement:This article is a reprinted article, and the copyright belongs to the original author. Please retain the source when reprinting!