Health benefits
Eggs: nourish blood
Butter: activate blood circulation and remove blood stasis
Ingredients
High-gluten flour ( 280g ) | Milk ( 120g ) |
Eggs ( a ) | Salt ( 2 grams ) |
White sugar ( 50g ) | Yeast ( 3 grams ) |
Butter ( 20g ) |
How to make milk bread
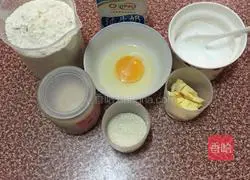
1.Get ready All materials
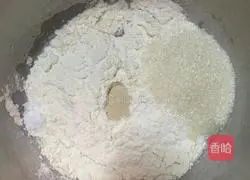
2. Put all the ingredients except butter into the dough bucket, put the milk first, Place eggs, flour, salt and sugar diagonally, and finally put yeast in the middle of the flour.

3. Start kneading the dough.I use a chef's machine to knead the dough.First, turn on the slow speed.5 minutes, then turn to the third gear, enter fast kneading, knead for a certain time and then stop, stop working for 15 minutes.Turn on the machine again and knead the dough for the second time, and do this twice.
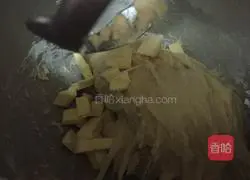
4. Before kneading for the third time, cut the butter into small pieces and put it in, and proceed with the above The same, after kneading the dough twice, it has been expanded, and it has been kneaded four times in total

5.This is Kneaded membrane
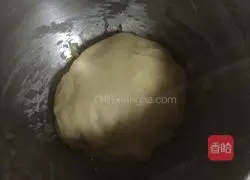
6.Cover with plastic wrap and let it ferment in a warm place for 2-2.5 times in size

7. Ferment until it doubles in size.Dip your fingers in flour and poke a small hole in the dough.If it does not rebound or shrink, Fermentation was successful.

8. Knead the dough directly on the chef's machine for a few minutes, which is equivalent to deflating the dough
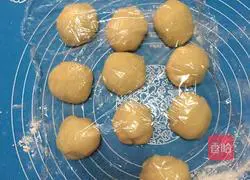
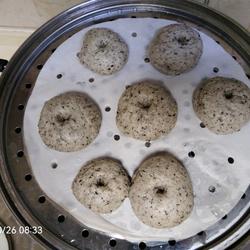
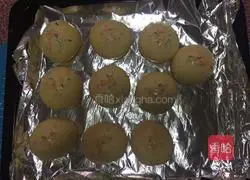
9. Divide the dough into equal sizes, then deflate and roll into balls.Cover with plastic wrap and let rise for about 15 minutes, then place on a baking sheet lined with greaseproof paper
10.Put in Secondary fermentation in oven or room temperature 1.5-2 times in size.Now that the weather is cold, I put it in the oven to ferment for 40 minutes
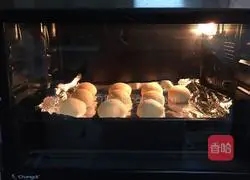
11. Preheat the oven, middle layer, top and bottom Heat 180 degrees for ten minutes.Lightly brush the fermented dough with a layer of egg wash, and dip the front with some decoration
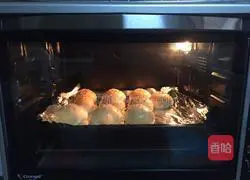
12. Put it in the oven, turn the heat up and down to 180 degrees, and wait for 10-15 minutes until the surface is colored.
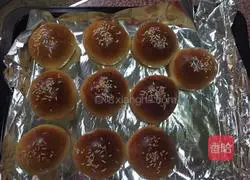
13. Take out of the oven and let cool before eating
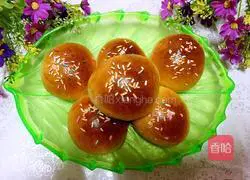
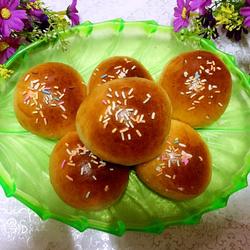
14.Finished product picture
Copyright Statement:This article is a reprinted article, and the copyright belongs to the original author. Please retain the source when reprinting!