Health benefits
Eggs: nourish blood
Butter: activate blood circulation and remove blood stasis
Ingredients
High-gluten flour ( 280g ) | Milk powder ( 20g ) |
Eggs ( 1 piece ) | Milk ( 110g ) |
Salt ( 1g ) | Fine sugar ( 45g ) |
| Butter ( 20g ) | Yeast powder ( 4g ) |
Red bean paste ( 200g ) |
How to make red bean toast bread
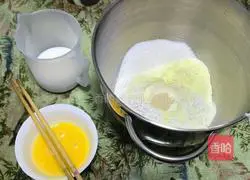
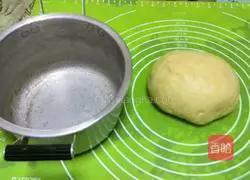
1.List of required materials (except butter and red bean filling)

2.Put the salt and sugar diagonally, dig a hole in the middle of the yeast powder, add the milk and then the egg liquid, start Knead the dough with a chef's machine at the second speed for 20 minutes.This is what it looks like.
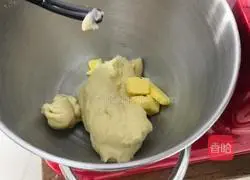
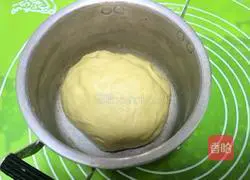
3. Add the softened butter and knead the dough on the second speed for 20 minutes.
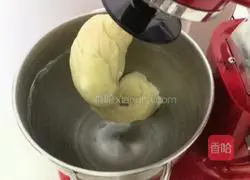
4. This is how it comes out.Take out the dough and knead it for 5 minutes.At this point the dough is ready to roll out.
5. Arrange the dough into a round shape and put it in the pot to ferment.
6.Put it away and cover it with a lid or seal it with plastic wrap.

7. Preheat the oven for fermentation and put the pot in for fermentation for 60 minutes.
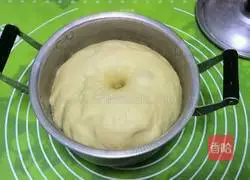
8. When it comes out it is twice as big and does not bounce back when poked with your hand.
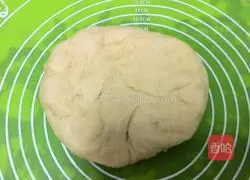
9. Organize and push the exhaust with your fist a few times.

10.Divided into three doses.
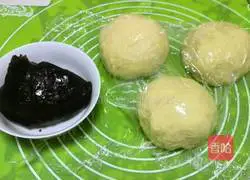
11. Cover with plastic wrap and let stand for 15 minutes.Take out the red bean filling and set aside.

12. Roll one of the dough into a rectangle, spread the red bean filling and roll it up.
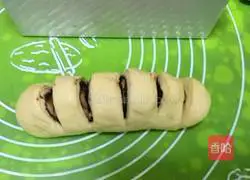
13. Cut the rolled dough with a knife a few times without cutting it, twist it and put it into the toast mold.
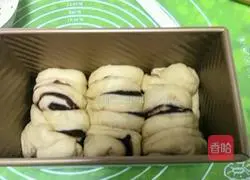
14. Use three ingredients to make it look like it will go into the toast mold.

15. Put it in the oven for secondary fermentation for 60 minutes and see if it is not full and then send it to 10 minute.
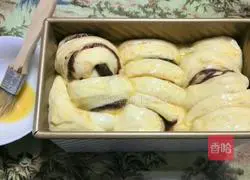
16.After eight minutes is full, take it out and brush it with egg wash.

17. Preheat the oven to 200 degrees for 10 minutes.The thermometer shows 190 degrees and you can put it into the mold.Bake, and finally set the oven to 200 degrees for 40 minutes.My thermometer shows 190 degrees for complete baking.

18.This is what it looks like after baking for 10 minutes.You can cover it with tin foil immediately after coloring.
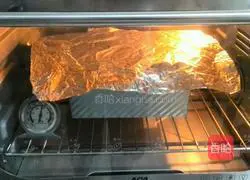
19. Add the tin foil and bake it completely.
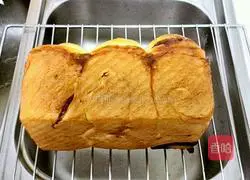
20. Take it out and look like it will be demolded immediately.
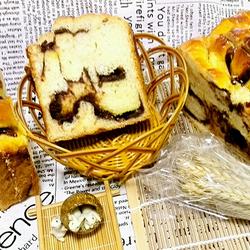
21.Turn over and take a look! Original photo without decoration.
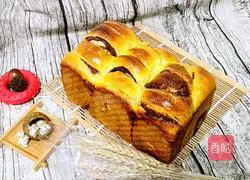
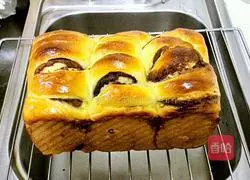
22. Does the decorated picture look good?
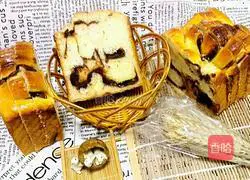
23.The cut picture looks better.
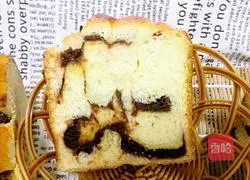
24.Enlarged picture! It’s time to eat.You and I ate one third of each piece and both said it was delicious.
Tips
The second fermentation is very important.You have to control the temperature according to the weather changes.If it is not enough, delay the fermentation time.The baking time should be carefully explored and should not be too short or too long.
Copyright Statement:This article is a reprinted article, and the copyright belongs to the original author. Please retain the source when reprinting!