Health benefits
Eggs: Nourishing blood
Butter: Low protein
Ingredients
High-gluten flour ( 270g ) | Milk ( 120g ) |
Salt ( 2g ) | Sugar ( 40g ) |
Egg ( one ) | Yeast ( 5g ) |
Butter ( 30g ) | Almond slices ( appropriate amount )div> |
How to make milky braided toast

1. Prepare all the ingredients and put in the ingredients except butter.Turn on the quick dough mixing function of the bread machine

2.After 20 minutes, place it at room temperature to soften Re-activate the quick dough kneading function with butter and continue kneading for 20 minutes.After the dough is out of film, the kneading is completed.The following is a picture of the film out state

3.Put it into a basin, cover it with plastic wrap and place it in the oven for fermentation.You can add a baking pan of hot water to increase the humidity
 4.After about an hour, the dough will be doubled in size as shown in the picture.
5. Deflate the dough and roll it into a rectangular shape

6.Divide the square into three equal parts

7.Take out one of them and roll it out slightly Flatten and then place it sideways

8. Fold the two sides toward the middle and then reshape it like a quilt.Rectangular

9.Use a scraper to cut into three parts without cutting off the head

10.Put it into a three-strand braid, just don’t make it too tight and loose

11.Fold both ends toward the bottom

12.Put in the toast mold (450g mold)

13.Cover with a wet cloth, put a baking pan of hot water on the bottom of the oven, put the dough into the oven and turn on the fermentation function to wait for the secondary fermentation
 14. After about 50 minutes, the dough will rise until the mold is 9 minutes full.Take it out and brush it with egg wash.At this time, preheat the oven at 180 degrees
15. Brush the surface of the dough with egg wash, sprinkle some almond slices on the surface, put it in the lower shelf of the oven at 180 degrees and bake for 30-35 minutes, add it after coloring Cover with tin foil to prevent the color from being too dark

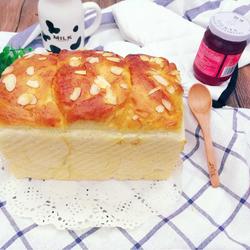
16.After baking, remove the mold while it is hot and the finished product will look beautiful.clatter!
Tips
The oven temperature will vary and the specific time needs to be adjusted according to your own oven.
Copyright Statement:This article is a reprinted article, and the copyright belongs to the original author. Please retain the source when reprinting!