Ingredients
Medium powder (watery and oily skin) ( 130g ) | Corn oil (water and oil peel) ( 50g ) |
White sugar (water and oil peel) ( 8g ) | Purified water ( Water and oil skin) ( 50g ) |
Medium flour (pastry) ( 100g ) | Corn oil (pastry) ( 55g ) |
Red bean paste (filling) ( 200g ) | Egg yolk liquid (brush the surface) ( appropriate amount ) |
How to make bean paste open cake

1.Put the ingredients for water-based crust and pastry into different containers and mix them together;

2. Knead the oil dough and pastry dough into smooth dough respectively, cover with plastic wrap and let rest for 20 minutes;
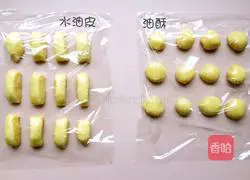
3. Divide the two kinds of risen dough into 12 even portions;
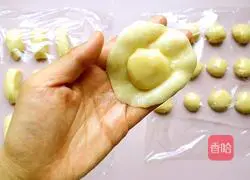 4.Take a piece of water-oil skin and press it into a thin disc with the palm of your hand, wrap a piece of pastry;
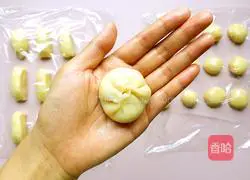 5.Close and pinch tightly like a small bun;
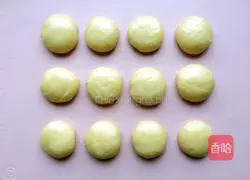
6. With the mouth facing down, place it neatly after the plastic surgery is completed;
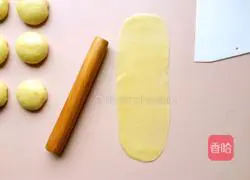
7.Take one of them and roll it into a thin long tongue shape;

8.Top-down volume Start;
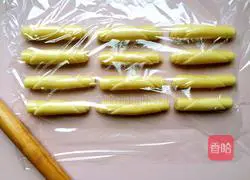
9. Follow the same steps to roll up the other stacks neatly, cover them with plastic wrap and let them rest for 10 minutes ;

10.After 10 minutes, take one of them and roll it again in the direction as shown.Thin tongue-shaped long slices and then rolled up;

11.After rolling everything, continue to cover Leave the plastic wrap to rest for 20 minutes;
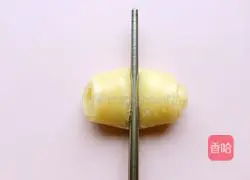
12.After 20 minutes, take a portion and use your index finger or chopsticks Press down from the middle;
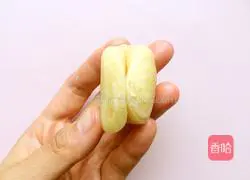
13. Overlap and flatten both sides, and roll into a round dough;

14. Wrap the bean paste filling in the same way as making steamed buns;
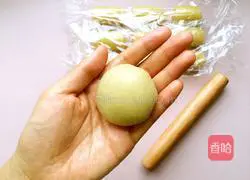
15.Organize and round the mouth downward;

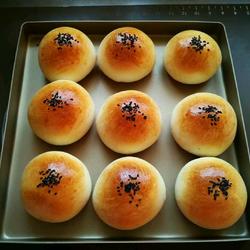
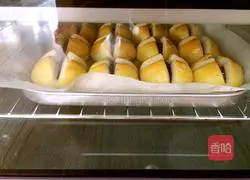
16.After done, place them in order, brush with egg yolk and let stand;

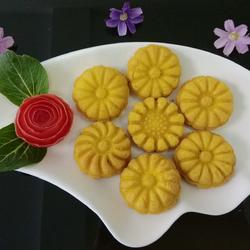
17.After the egg liquid has solidified, use a knife to cut cross patterns, line the baking sheet with oiled paper and arrange them neatly;
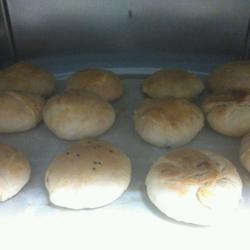
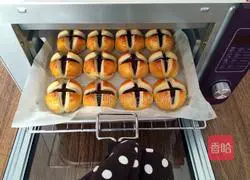
18.Put it in the oven and bake the middle layer at 190 degrees for 25 minutes;
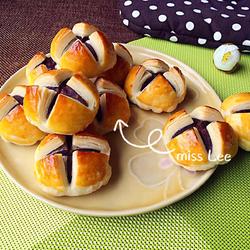
19.This is when baking for about 15 minutes, you can clearly smell the aroma, and you can also clearly see the layers of puff pastry;
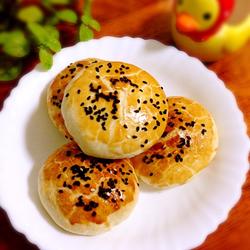
20.Ding~~ It’s ready to be baked!

21.Get closer, it feels good
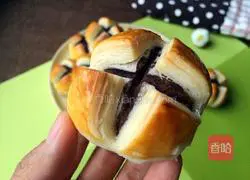
22.The layering and crispiness can be seen with the naked eye→
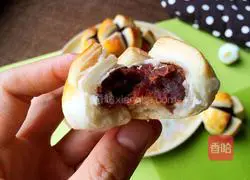
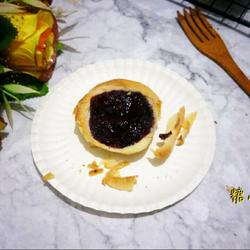
23.Don’t be too delicious! !
Tips
*The two wrapping movements must be done tightly.Leaking crisps and fillings will affect the taste of the final product
*When cutting cross flowers, be sure to wait for the egg liquid to fully solidify, otherwise it will easily deform
/>
*The baking temperature and time depend on the specific oven conditions, please consider the characteristics of your own oven
Copyright Statement:This article is a reprinted article, and the copyright belongs to the original author. Please retain the source when reprinting!