Ingredients
Flour ( 500 grams ) | Peanut oil ( 30ml ) |
Lard ( 30ml ) | Salt ( a small amount ) |
Boiling water ( 330ml ) | Chopped green onion ( A small amount ) |
How to make green onion hand cakes
-

1.Prepare 500 grams of wheat flour, just not low-gluten (this amount is for a family of three, you can reduce it appropriately for small people)
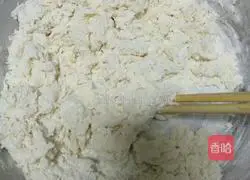
2.Add about 270ml boiling water (above 90 degrees) for the first time, and use chopsticks to stir the flour in one direction to form floc.
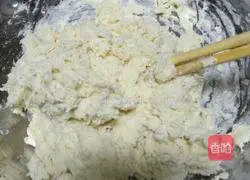
3. Pour the remaining 60ml boiling water into the flocculent flour and continue to stir evenly in one direction.It's best to knead it with your hands a few times to see if the flour is just right and not too soft! If it's too dry, add boiling water in batches.
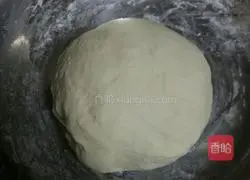
4. Knead the flour until it is not hot enough to form a smooth dough and cover it with plastic wrap Relax for half an hour.(Knead for a while)
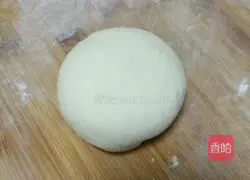
5. Divide the relaxed dough evenly into five to six About 2 pieces of dough, and take one out for later use.One dough stick weighs about 90-100 grams.
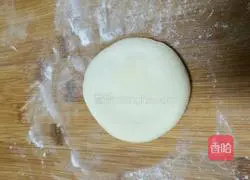
6. Flatten it with your hands and start rolling the dough
8. Brush with a layer of oil and sprinkle a little salt evenly.
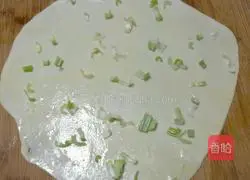
9.Sprinkle with the chopped green onions prepared in advance.
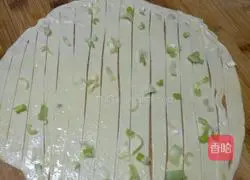
10.Cut into 1cm wide strips, but do not cut the edges.

11.Pull together slowly

12.It’s all gathered together, twist it twice, it’s too awkward
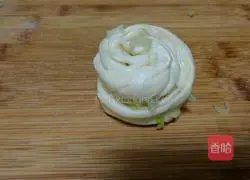
13. Roll it up, one end up and the other down.
14.Crush with iron sand palm
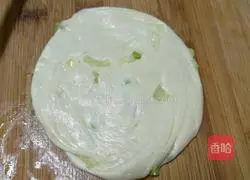
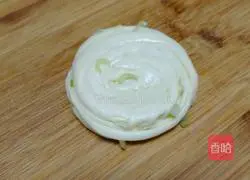
15. Brush both sides with a layer of lard.If you don’t have lard, you can use peanut oil instead, but the taste will be different and not fragrant enough.
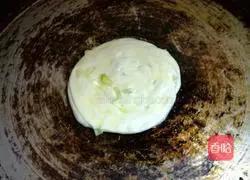
16. Preheat the pan over medium-low heat, pour in an appropriate amount of peanut oil, and put the dough in Put it into the pan, use a spatula to flatten the pancake, and fry both sides.

17.Turn over once, brush with a layer of oil, and flatten once.Fry until both sides are golden brown.It takes about three to four minutes to cook on both sides.
18. Use a shovel to press the pie.It feels elastic and the edges of the pie have changed color., then poke the sides with chopsticks and reply quickly to prove it is done.
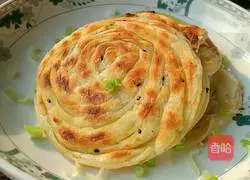
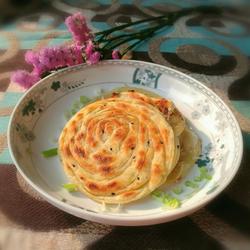
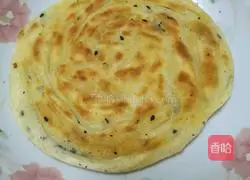
19.You can clearly see the layering of the baked cake.
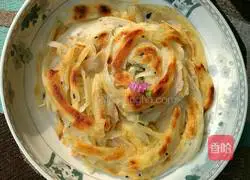
20. Use chopsticks to shake it up until it falls apart and you can eat!
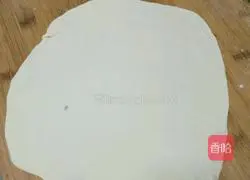
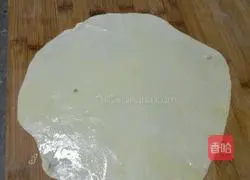
7. Roll it out thinly, the thinner the better.Sprinkle more flour and it will be easier to roll out without sticking.
Tips
1.Blanching the noodles with boiling water will help prevent the noodles from shrinking.
2.Roll it out as thinly as you can, so that it has many layers.
3.When cutting strips, do not cut the edges.
4.If you like the skin to be crispier, you can leave the lid on, but you need to brush more oil and press the cake thinner.
Copyright Statement:This article is a reprinted article, and the copyright belongs to the original author. Please retain the source when reprinting!