Health benefits
Eggs: nourish blood
Butter: activate blood circulation and remove blood stasis
Ingredients
High-gluten flour ( 250g ) | Water ( 100g ) |
Eggs ( 1 ) | Fine sugar ( 50g ) |
Salt ( 3g ) | Yeast ( 3g ) |
Butter ( 20g ) | Butter (filling) ( 20g ) |
Egg liquid (filling) ( 15g ) | Coconut (filling) ( 40g ) |
Milk (filling) ( 10g ) | Powdered sugar (filling) ( 15g ) |
How to make coconut bread

1.Add water, sugar and salt into the bread bucket and stir until melted
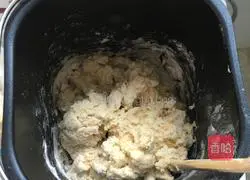
2.Except for the butter, add to the bread bucket, stir into a paste, and let stand for a while
3.Knead the dough in a bread machine for 20 minutes
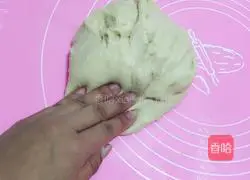
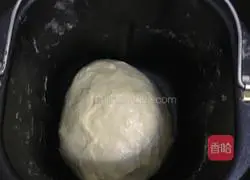
4.Add softened butter and knead for 20 After a few minutes, take out the dough and place it on the silicone mat, beat, beat, knead, and tumble

5. Take action Membrane
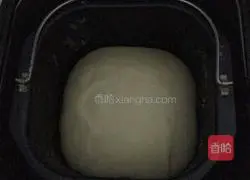
6.Put it into a bread barrel and ferment it once (the temperature is low in winter now, about two hours) )
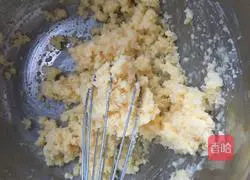
7.At this time prepare the coconut filling, mix all the filling ingredients evenly, and refrigerate Reserve

8. Let the dough rise until it doubles in size.Dip your finger in flour and it will not come back when you poke it.Just shrink it
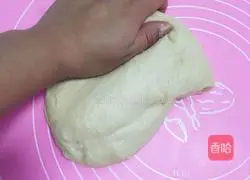
9.Take out the dough and knead it a few times to release the air
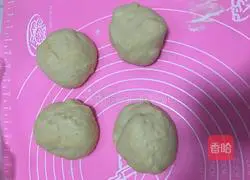
10. Divide into small portions, cover with protective film and let rest for about 20 minutes
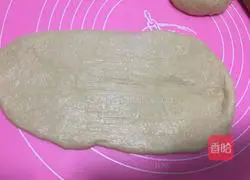
11. Cover with insurance film and roll into a rectangular cake shape
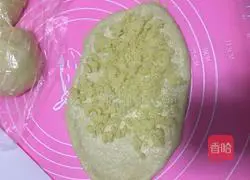
12.Spread the coconut filling on two-thirds of the top
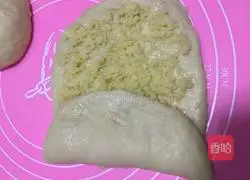
13.Never The filling area begins to fold into a square shape like a quilt
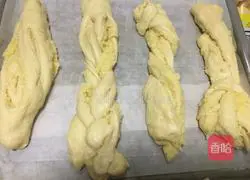
14. Use a knife to cut and shape , cover with plastic wrap, and place on the baking sheet for secondary fermentation (you can freely play with this, I also braided it into a random braid shape, forgive my handicap)
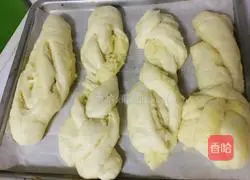
15. Ferment until 1.5 times in size (I fermented it on a wok and put hot water in the pot), and brush with egg wash.
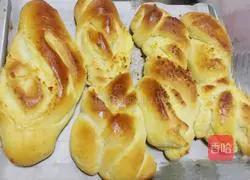
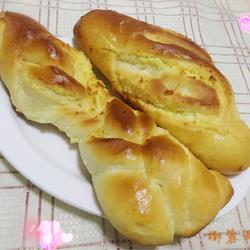
16. After the oven is preheated, put the bread into the upper and lower tubes of the oven and bake at 140 degrees for about 20 minutes.The finished product Figure
Tips
Also reserve a little of the egg liquid at the beginning for brushing the surface to avoid waste.Because the oven temperature is different, you can control the time and temperature yourself.Mine is on the higher side.You can observe the coloring degree at any time and cover it with tin foil
Copyright Statement:This article is a reprinted article, and the copyright belongs to the original author. Please retain the source when reprinting!