Health benefits
Red beans: clear away heat and detoxify
Mung beans: nourish blood, protect teeth, protect bones
Kidney beans: low in protein
Ingredients
Medium powder ( 240g ) | Cake powder ( 226g ) |
| Red beans ( 100 grams ) | Mung beans ( 100 Grams ) |
Kidney beans ( 100 grams ) | Lard ( 180g ) |
Water ( 100 grams ) | White sugar ( 60 grams ) |
Brown sugar ( 20g ) | Cranberry ( 100g ) |
Corn oil ( 90g ) |
How to make Soviet-style mooncakes in light wave oven

1.Oil skin: 240g medium flour + 70g lard + 10g sugar.Put it in a basin, add 100 grams of 70-degree water, and mix well.

2. Pastry: 226g low flour + 110g lard, mix well.

3. Prepare the fillings:
Red bean filling, put the red beans into the pressure cooker and cook Mash it, then add it to a food processor and beat it into a puree.Pour 20 grams of white sugar, 20 grams of brown sugar and 30 grams of corn oil into the pot.Fry over low heat until the puree can form a ball, then put it into a bowl and set aside.
Mung bean filling, same as above, replace red beans with mung beans and brown sugar with white sugar.
Cranberry filling, same as above.Replace the green beans with kidney beans, sauté them and add the cranberries.
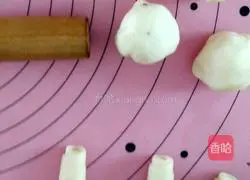
4. Divide the oil crust into 16g equal portions and cover with plastic wrap.Divide the pastry into 12g equal portions and cover with plastic wrap.

5.Take a piece of dough and flatten it into a piece of dough to close it.

6. Then drive it from the middle to both sides, forming a cow tongue shape.

7. Roll up from bottom to top.
8. Roll them up in sequence and arrange them in order.

9.After all the rolls are finished, take out the first roll.Get away.

10. Catch up to the long strip.

11. Roll up from bottom to top.

12.Put the rolled ones in order.
13.After rolling it up in turn, take the first rolled one and stand it up for use Press your hands down into a circular shape.

14.Press the dough several times to almost cover the filling, that’s it.Bean paste filling 25g each.
15. Wrap in the filling and close.

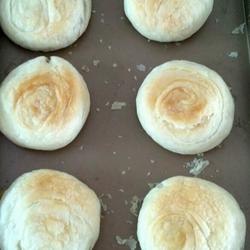
16. Place the seams side down into the baking pan, and press each one flat with your hands.

17.Light wave furnace, fire power 70%, press the light wave combination twice, time two minutes to warm up.Then, still use this firepower and light wave combination for 15 minutes.

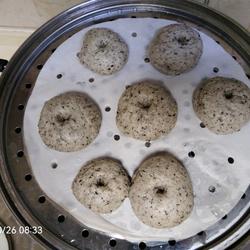
18.Eat so much
Tips
If the surface of the pie is smooth and texture-free, flatten it horizontally Make the stuffing.After the stuffing is wrapped, it will be crispy if not flattened.With these ingredients, you can make 26 to 28 moon cakes.If there is a lot of filling, keep it in the refrigerator for next time.It can only be stored for about three days, and there are no preservatives in the homemade ones.
Copyright Statement:This article is a reprinted article, and the copyright belongs to the original author. Please retain the source when reprinting!